In this how-to tutorial we will look at how deploy a new virtual machine (VM) using the new VMware vSphere 5.1 Web Client. The new vSphere 5.1 web client is web/browser based full featured, intuitive and provides all the features of the installable client. This is going to be one of the first how-to guides related to accomplishing everyday tasks in the vSphere web client over the next few weeks.
So, how do you create a virtual machine in the Web Client 5.1?
- To take advantage of the new features in vSphere 5.1 and the Web Client in particular, make sure you have upgraded to the latest edition of VMware vCenter.
- Make sure you have installed the vCenter Single Sign on component
- Install the VMware vSphere Web Client
- Browse to the web client URL ( https://vCenter-server-ip-or-hostname:9443/vsphere-client )
- Login with your username and password, it should put you on the vSphere web client homepage
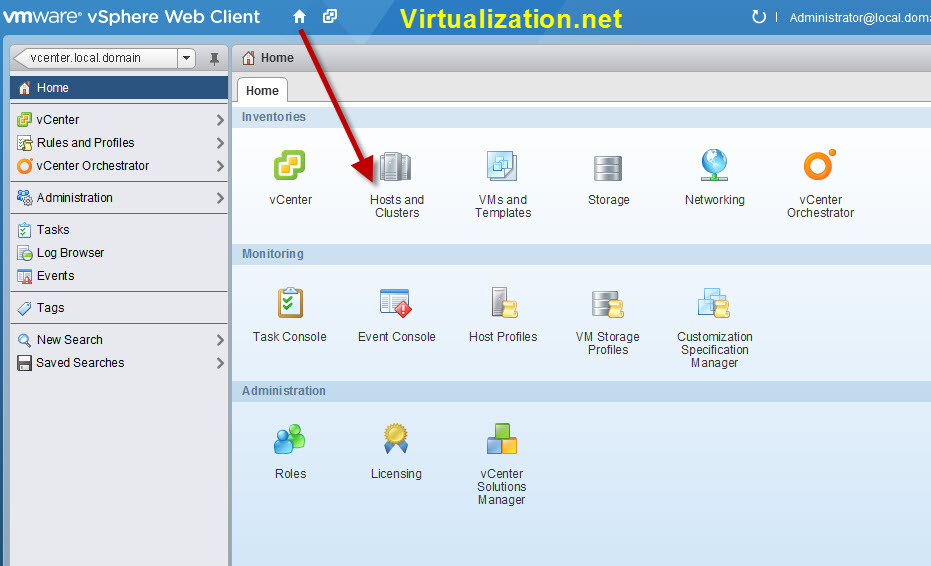
- In “Inventories” click on the Hosts and Clustersicon/object

vSphere 5.1 Web Client homepage - From here there are number of ways to go about creating a new VM
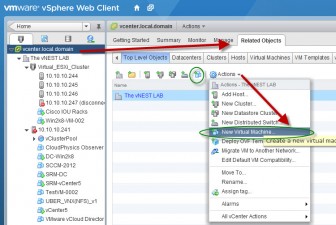
- From vCenter root, click on Related Objects
- Click on “Actions” drop down and select “New Virtual Machine” or click on the “create a new virtual machine” icon under “Top Level Objects” or “Virtual Machines” tab.

vSphere 5.1 Web Client New VM - Alternatively, you can click on a host and then select “New Virtual Machine” from the actions drop down menu or click on the “create new virtual machine” icon when at the host pane.
- After you click “New Virtual Machine” link, a wizard will guide you through the process to:
- Select creation type
- Select name and folder
- Select a compute resource (host, resource pool, etc.)
- Select Storage/Datastore. From here you will be able to select VM storage profile as well (if you have it configured already)
- Select Compatibility (ESX 4.x and later or ESX 5.0 and later)
- Select a guest OS (windows, linux or other)
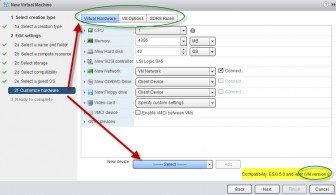
- Customize hardware – allows you to select CPU, memory, hard disk, network, scsi controller, vido and other devices and components along with other VM options and SDRS rules (see screenshots) Note: If you are running hosts with ESXi 5.0, you will not be able to select hardware version 9, so it defaults to version 8)

vSphere Web client VM Cutomize hardware - Ready to complete (gives you over view of the VM options and settings before finishing the task)
At this point, you click on Finish and vCenter will create new VM and web client will refresh. This has been one of the first how-to tutorials related to the new vSphere 5.1 web client, I hope it was helpful for some of the users out there. If you have any questions or comments please feel free to contact us or post in our virtualization forum.


